A Comprehensive Beginner's Guide to Crochet
- Blog Views : 1183
- Symfonie Yarns
- 16Dec, 2023
Welcome to the exciting world of crochet! If you've ever thought about creating beautiful wearables or cozy blankets, you're in the right place. In this step-by-step guide, we'll take you through the fundamentals of crochet, making it easy to grasp even if you're a complete beginner. And to top it off, we'll introduce you to Symfonie Yarns’ premium merino wool – the perfect companion for your crochet journey.
Understanding Crochet Basics
Crochet is an ancient craft that involves creating fabric from yarn loops using a crochet hook. While it might seem a little daunting at first, rest assured, mastering crochet is all about practice and patience!
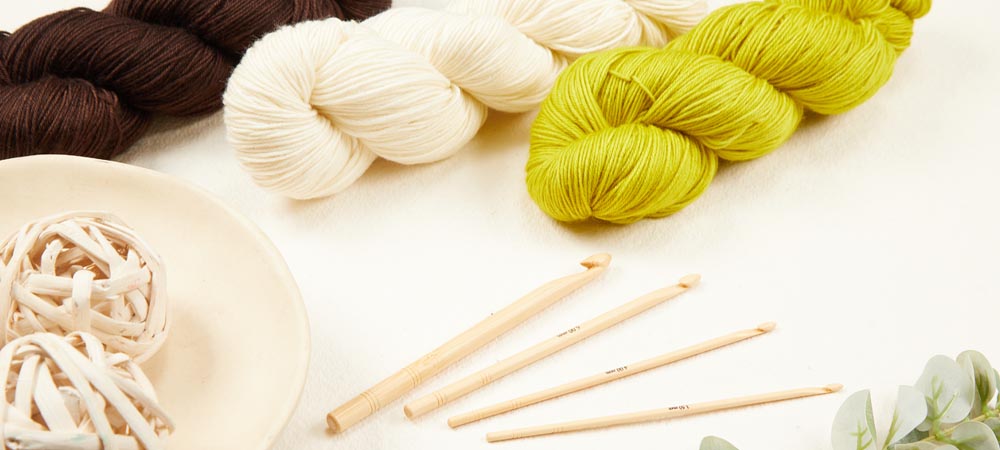
Essential Crochet Tools
To begin your crochet adventure, you’ll need two basic tools:
- A crochet hook
- Yarn
You can also get a darning needle and a small pair of scissors- these will come in handy while fastening off your crochet work.
Yarn comes in various weights and textures. For a smooth start to your crochet journey, we recommend Symfonie Yarns’ premium merino wool hand-dyed yarn in Viva. Its smooth texture and light colors like Jasmine or Pink Guave will make it super easy to see your stitches and are perfect for beginners.
Choosing the Right Crochet Hook
Crochet hooks come in different sizes to match the yarn's weight. For beginners, an ergonomic hook ranging from size F (3.75mm) to G (4.50mm) is a good starting point. Make sure to match the hook size with your yarn weight for a seamless crocheting experience.
Let’s get into the basics of crochet with these step-by-step instructions:
Step 1: Holding the Crochet Hook
First things first – find a comfortable way to hold the crochet hook that feels natural to you. The pencil grip is similar to holding a pencil when you write. Hold the crochet hook between your thumb and index finger as if you're writing with it. With the knife grip, you hold the crochet hook as if you're holding a knife while cutting food. Grip the handle of the hook with your whole hand, allowing your palm to face downwards over the hook.
Step 2: Holding the Yarn
Wrap the yarn around your non-dominant hand's fingers for control and tension. Begin by passing it over your pinkie, under the middle and third fingers, and finally over your index finger. For extra tension, encircle the yarn around the pinkie before threading it under the other fingers. Holding the yarn may feel a little tricky initially, but with practice, you’ll find your rhythm.
Step 3: Tying a Slip Knot
To create a slip knot, take a length of yarn, leaving a 6-inch tail. Form a clockwise loop with the yarn, laying the ball end over the tail. Insert the hook into the loop's center, hooking the ball-end yarn and pulling it through. Then, tighten the loop around the hook by pulling both ends of the yarn. The slip knot is complete, and you are ready to start!
Step 4: Making a Starting Chain
To begin the starting chain, hold the crochet hook in your dominant hand and the yarn in your other hand. Securely hold the end of the slip knot between your left thumb and middle finger.
Guide the working yarn over the hook from the back to the front in a motion known as "yarn over." Then, slightly rotate the hook to catch the yarn in the hook's bowl and pull it through the loop on the hook, forming the first chain stitch.
To continue the chain, yarn over the hook again and pull up another loop. Repeat this process, crafting the number of chain stitches required for your pattern. For instance, for this swatch, create 11 chain stitches.
As you form the chain, steadily move your left-hand fingers along the chain, holding it two or three stitches away from the hook to maintain better control.
Hold on though! One key factor to remember when counting the chains is to exclude the loop on your hook or the slip knot from the stitch count.
Step 5: Single Crochet Stitch
Single crochet is a fundamental stitch that's fantastic for beginners! Often abbreviated as SC in crochet patterns, it is a versatile and widely used stitch. For our swatch, let’s begin with a chain of 11 stitches, utilizing the starting chain from our previous step. Then, insert the hook into the second chain from the hook. Loop the yarn over the hook from back to front, pulling it through the chain to form a loop on the hook.
Now, with two loops on the hook, yarn over again and pull the yarn through both loops to complete your first single crochet. Repeat this process, crafting one single crochet into each of the remaining nine chain stitches, totaling 10 single crochets. Remember to avoid twisting the chain as you work through it!
Step 6: Finishing Off
To finish off your work, cut the yarn, leaving a 6-inch tail. Then, pull the yarn tail through the loop on your hook using the hook itself. After removing the crochet hook, tug on the yarn tail to tighten the knot securely. If needed, consider weaving in the yarn tails to keep them in place and secure your work- for that extra layer of protection!
By following these step-by-step instructions and practicing consistently, you’ll be well on your way to becoming a confident crocheter. And remember, with Symfonie Yarns’ premium merino wool by your side, your crocheting journey will be both enjoyable and rewarding. So, grab your crochet hook, pick up some Symfonie Yarns, and let's crochet something beautiful together!
-
- 02 Dec,2025
-
- 27 Nov,2025
-
- 24 Nov,2025
-
- 19 Nov,2025
-
- 17 Nov,2025
-
- 10 Nov,2025
Copyright © Symfonie Yarns 2025 - all rights reserved | RSS Feed